V5.11.62 Ubuntu 22.04 Setup/Migration (noob edition)

So I’m hoping this will be a noob friendly guide to setting up v5.11+ on Ubuntu 22.04.

As a disclaimer - none of the information here is provided by me specifically - it’s going to be taken from all sorts of resources and (hopefully) end up with a successful install.

I’ve tried this and gotten stuck on different parts each time, so hopefully the more seasoned persons here can provide instructions and insight.

Here are two resources right off the bat.

The intention is to provide persons with easy copy/paste details to get things up and running as quickly as possible. Whether you’re running a VM, physical box or a VPS - I’m hoping the details here will help to get things done.

It’ll take a bit of time - so let’s start with that.

STEP 1

So the first thing needed is something running Ubuntu Linux. Get your ISO and install on your VM or physical box. If you’re going with a VPS then get that set up.

You can check what version of Linux/Ubuntu you’re running by using the following command.

lsb_release -a

You can see from mine that I’m running 22.04.


Now some persons may be like myself and more familiar with DOS than with Unix/Linux. The transition isn’t that hard with some commands. Instead of MD to make a directory, it’s MKDIR. It’s still CD to change directory, but you have to put a space and then the path.

“CD /var/www/” for example. Changing to the root directory would be “CD /” instead of “CD\” on a DOS system.

Also bear in mind that Linux is case-sensitive for the directory and file names. This means you could actually have two files with the same name, but one has an upper case. I created two using the “nano” editor as shown here.

Personally I find NANO to be easier than VIM. But that’s just me. So be careful with the naming. As another note - “LS” is the equivalent of “DIR”.

Moving on.

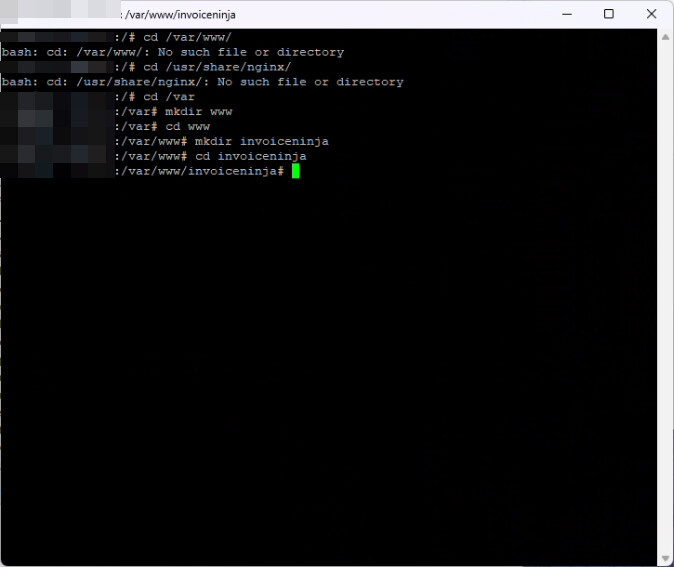
Now I saw two different lines of thought on this part. Do I create the IN directory under “/var/www/” or under “/usr/share/nginx” ?

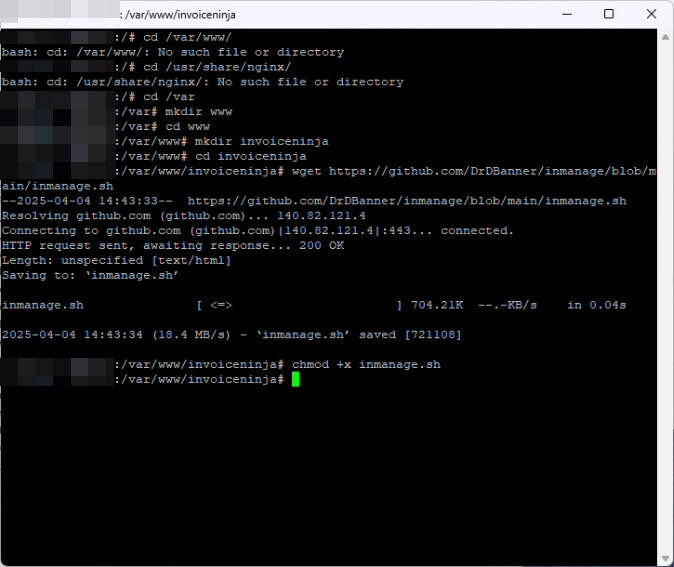
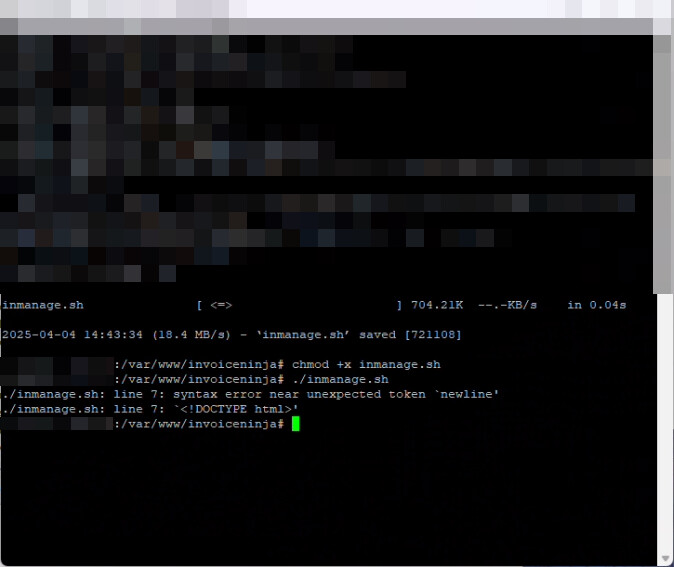
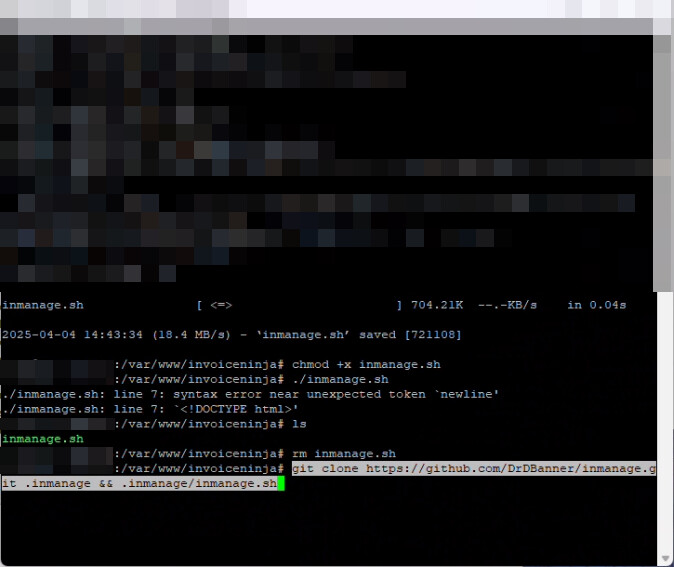
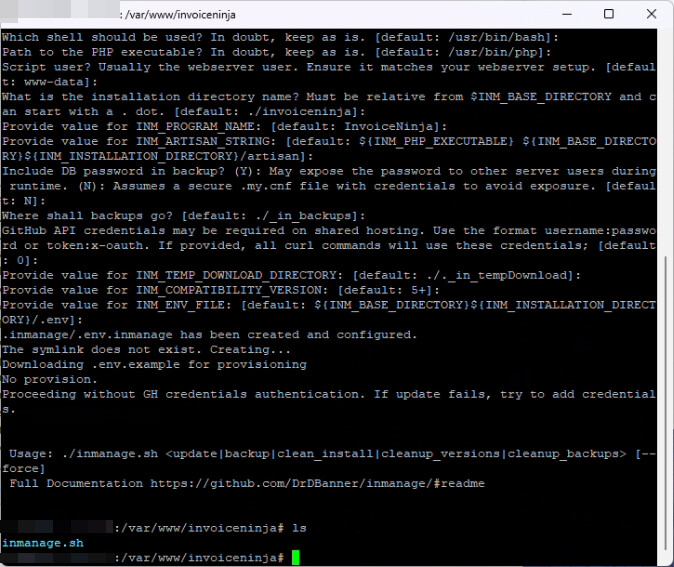
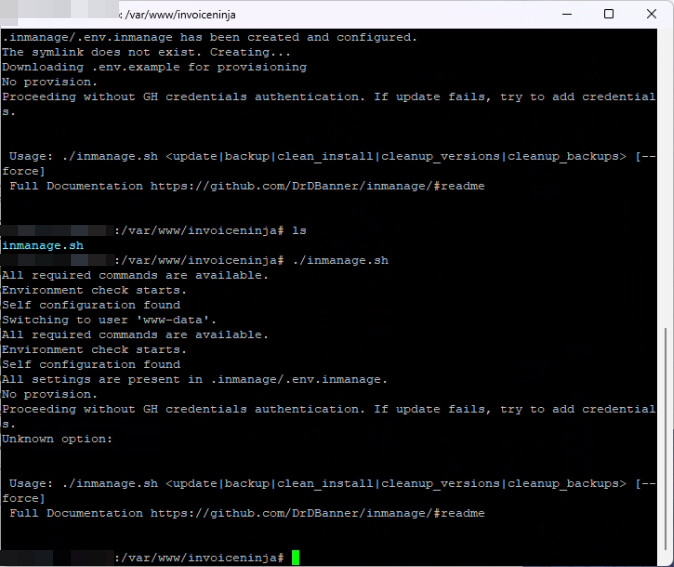
I guess it depends on whether I’m using nginx or Apache2 right? Well - let’s try with an install script first and see how that goes. It should simplify the entire process if it works properly.

I’m going to tag @hillel just for awareness. This is a personal item that I hope will help others. The actual intent here is to move from a shared hosting to self-hosted due to resource issues.

I’ll be back later on when I scrub the system again and have a bit of time to go through the process and screenshot.

STEP 2

I think the next thing to do is set up the dependencies. The guide by TechnicallyComputers linked above seems to have the best working instructions. I’ll show why in a minute.

# apt update
# apt dist-upgrade -y

# add-apt-repository ppa:ondrej/php
# apt update

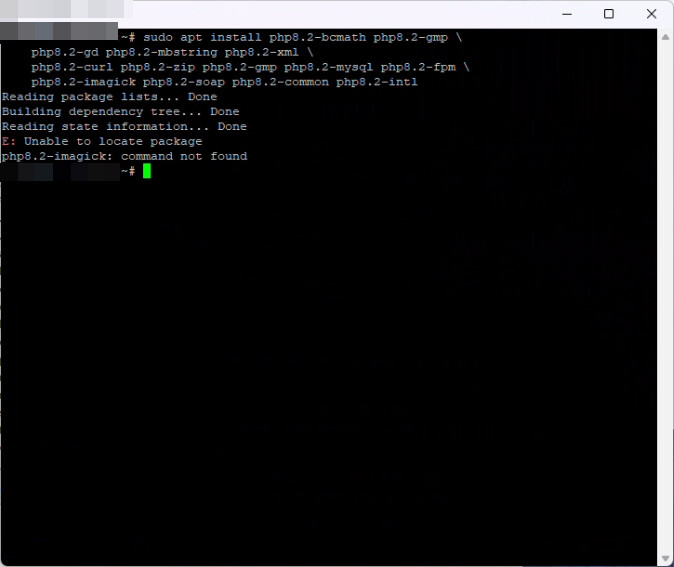
# apt install php8.3-bcmath php8.3-gmp php8.3-fileinfo \
    php8.3-gd php8.3-mbstring php8.3-pdo php8.3-xml php8.3-cli \
    php8.3-curl php8.3-zip php8.3-gmp php8.3-mysql php8.3-fpm
    
# apt install mariadb-server mariadb-client nginx vim

So the above instructions are given. Let’s do each.

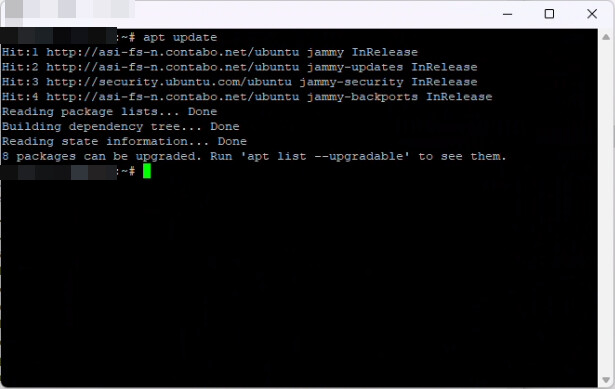
apt update runs and tells us there’s some upgrades available. So let’s run apt upgrade right after.

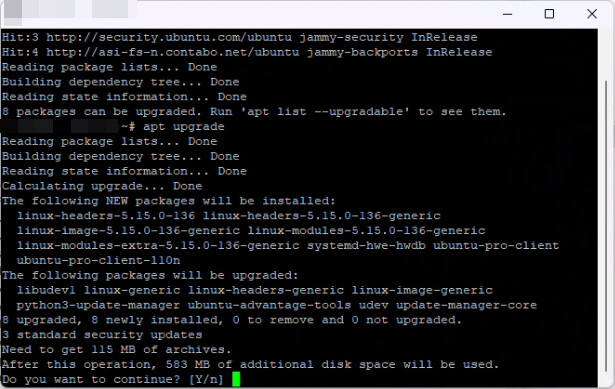
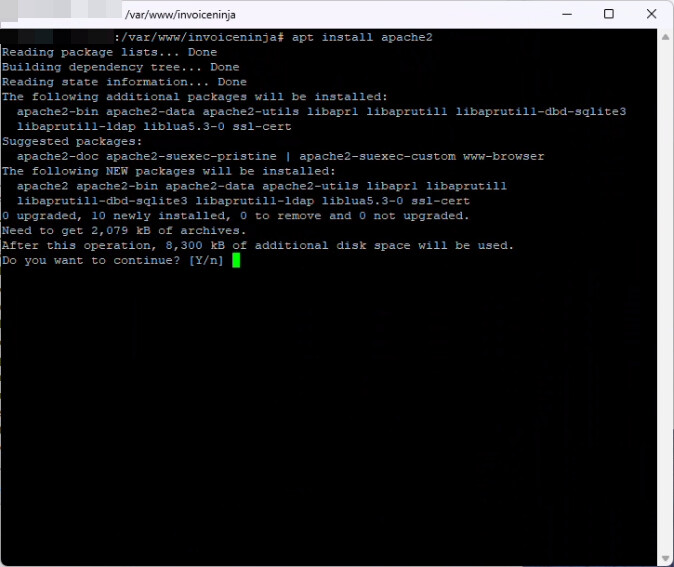
We can see that some stuff will be installed. So we’ll press Y and continue.

Wait for it to finish and proceed.

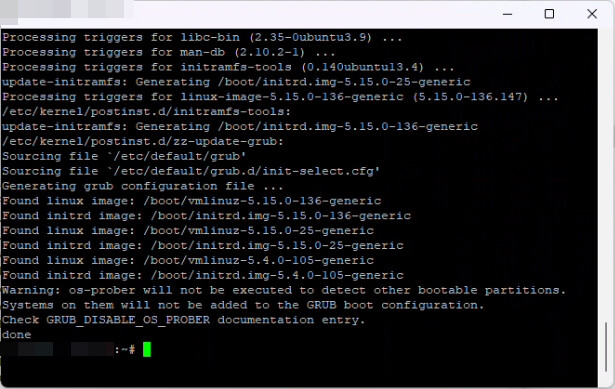
Next is apt dist-upgrade -y and let that process.

Next we’ll run add-apt-repository ppa:ondrej/php followed by apt update.

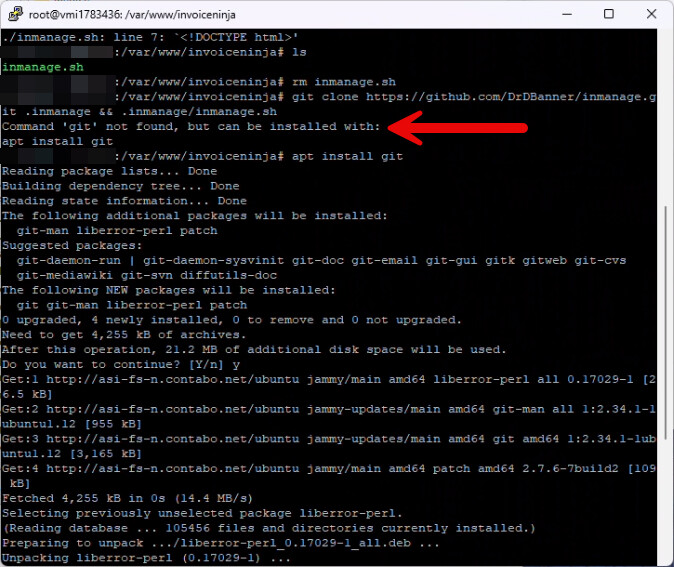
We get an error saying we can’t use add-apt-repository, but we can install it using apt install software-properties-common - so let’s do that since it’s needed.

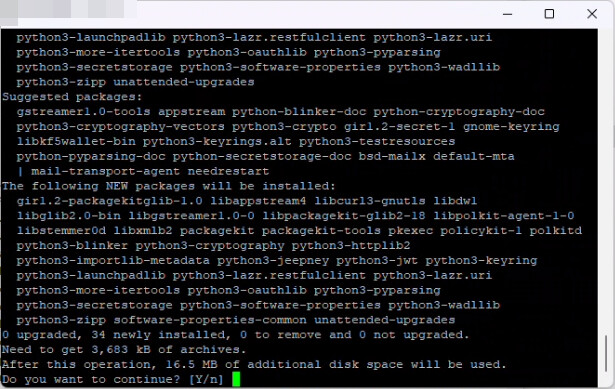
Again we’re prompted about added stuff - but we need it so we proceed.

That’s where I’m stopping for now - will be back later with more.

I’ve confirmed that v5 won’t run on my shared web hosting. That’s an issue, but let’s try to continue with setting this up. Let me move back to my PC and focus a bit. I’m going to run into some issues and hopefully the more experienced persons here can provide some insight.

So now. Once the last command is completed which was apt install software-properties-common - we can once more run add-apt-repository ppa:ondrej/php.

We get a prompt - press ENTER to continue.

Then we run apt update. If it says there’s more stuff that can be upgraded - we can run apt upgrade once more.

Once done, we should next be running the following:

sudo apt install php8.2-bcmath php8.2-gmp
php8.2-gd php8.2-mbstring php8.2-xml
php8.2-curl php8.2-zip php8.2-gmp php8.2-mysql php8.2-fpm \
php8.2-imagick php8.2-soap php8.2-common php8.2-intl

Let’s see what happens.

This is where I got my first error. So how to get around this? Literally running sudo apt install or apt install for each item.

apt install php8.2-bcmath
apt install php8.2-gmp
apt install php8.2-gd
apt install php8.2-mbstring
apt install php8.2-xml
apt install php8.2-curl
apt install php8.2-zip
apt install php8.2-gmp
apt install php8.2-mysql
apt install php8.2-fpm
apt install php8.2-imagick
apt install php8.2-soap
apt install php8.2-common
apt install php8.2-intl

If any prompts you to continue - hit yes - since you need them.

With that done - let’s try an install script.

Let’s check if any of the directories mentioned before actually exist.

Since that’s not the case - let’s just pick /var/www/ as the path. So here’s what I do.

First - cd /var/ and then mkdir www to create the directory. Then cd www to switch into that directory - then mkdir invoiceninja - and finally cd invoiceninja. Your full path should then be /var/www/invoiceninja or whatever directory name you choose. Should really have just called it “ninja” to make life easier - but meh…

Now let’s grab the install script from above using wget https://github.com/DrDBanner/inmanage/blob/main/inmanage.sh. Then we tell Linux it should allow that file to be executable by using chmod +x inmanage.sh.

Next - we run the executable with ./inmanage.sh and follow the prompts.

Instead - we get errors. So…what to do now? Let’s try using git clone https://github.com/DrDBanner/inmanage.git .inmanage && .inmanage/inmanage.sh from the site instructions after deleting the existing inmanage.sh file.

Turns out that GIT isn’t installed. So let’s deal with that by running apt install git - agree/yes and then run the above command once more.

With that done we now find that there’s two other items not installed - mysqldump and mysql. So let’s try and resolve that.

Let’s run apt install mariadb-server mariadb-client nginx vim from the other set of instructions - agree to whatever comes up and proceed.

This should allow us to now run the prior command of git clone https://github.com/DrDBanner/inmanage.git .inmanage && .inmanage/inmanage.sh - but it requires removal of the previously downloaded files. So let’s run rm -r .inmanage first. This should remove the previously downloaded files that are in a hidden folder - then we can run the “git clone” command.

Now we’re finally getting somewhere. Let’s process the prompts and see.

There’s a lot of stuff to review. At the end, it should take you back to your prompt with a newly created inmanage.sh file available. You can view the directory listing by using the ls command.

So let’s run that using ./inmanage.sh and see what happens.

And this is where I get stuck with the install script option. So let’s try something else?

So since getting stuck, let’s try this. Find the latest release link. As of this post, it’s:

Most instructions you’ll find have details about a ZIP file, but the one here is a TAR. So let’s grab that and extract it.

wget https://github.com/invoiceninja/invoiceninja/releases/download/v5.11.62/invoiceninja.tar

Once it’s downloaded, let’s extract the file using the command tar -xvf invoiceninja.tar and wait for it to complete. Once done, you can delete the original TAR file using rm invoiceninja.tar. You can then do a ls to see the directory structure.

At this point I’d say configure either Apache2 or NGINX. I’m going to go with Apache2 - so my next command is apt install apache2 and agree.

Next, I’ll follow the database creation template given.

# mysql -u root -p
Enter Password:  ******
MariaDB .. > create database invoicedb;
MariaDB .. > create user 'ninja'@'localhost' identified by 'ninjapass';
MariaDB .. > grant all privileges on invoicedb.* to 'ninja'@'localhost';
MariaDB .. > flush privileges;
MariaDB .. > exit

Bear in mind that the “invoicedb”, user called “ninja” and the password called “ninjapass” should be changed to what you’d like.

Next we’ll copy the .env file and edit it. First with the copy using sudo cp .env.example .env and then we can edit using sudo nano .env.

Here you want to focus on three entries:

DB_DATABASE=
DB_USERNAME=
DB_PASSWORD=

These should have the information as you just processed it for the database creation. Save and close using CTRL+X and then agreeing to write out the file. Next you want to grant ownership to www-data for web purposes.

sudo chown www-data:www-data /var/www/invoiceninja/.env

Generate a unique key for the database with sudo php8.2 /var/www/invoiceninja/artisan key:generate. I got the following screen and selected YES.

Then migrate the database using sudo php8.2 /var/www/invoiceninja/artisan migrate:fresh --seed. Again it gave me a prompt - selected YES - and proceed.

STEP 3

Since we’re using Apache, let’s create a virtual host file for IN.

sudo nano /etc/apache2/sites-available/invoice-ninja.conf

Edit the part about your server name and save the file.

<VirtualHost *:80>
    ServerName invoice.yourdomain.com
    DocumentRoot /var/www/invoiceninja/public

    <Directory /var/www/invoiceninja/public>
       DirectoryIndex index.php
       Options +FollowSymLinks
       AllowOverride All
       Require all granted
    </Directory>

    ErrorLog ${APACHE_LOG_DIR}/invoice-ninja.error.log
    CustomLog ${APACHE_LOG_DIR}/invoice-ninja.access.log combined

</VirtualHost>

Enable the virtual host using sudo a2ensite invoice-ninja.conf and then enable rewrite using sudo a2enmod rewrite. Next it’s a matter of restarting Apache using sudo systemctl restart apache2 - and you should then be able to access your site. In my case - got an error with Apache. So rebooted the system.

If you don’t get your setup page, run sudo a2dissite 000-default.conf to disable the default virtual host and restart Apache once more using sudo systemctl restart apache2 and/or ‘systemctl reload apache2’.

Now - these should work - theoretically - but I got the image below instead.

So I’m going to remove Apache and try NGINX to see what happens.

I’ve been up since 2AM and it’s now 8:38AM - plus I have go drive out of town for work. So I’ll be back later to do more tests unless someone with more XP comes on and gives better insight or suggestions on what to do.

If/When I get this working I’ll post a consolidated or condensed version.

EDIT
Will be using these links to try and get something working.

So - back again. Going to recap what was done up until the setup of NGINX.

Assuming you’ve set up and logged into your box/VM/VPS.

cd /var
mkdir www
cd www
mkdir invoiceninja
cd invoiceninja

Next set of commands used were:

apt dist-upgrade -y
apt install software-properties-common
add-apt-repository ppa:ondrej/php
apt update
apt upgrade

Each time you get prompted - just process it and continue. I then found that all of the other dependencies could be installed if you just list and space them. So…instead of this:

apt install php8.2-bcmath
apt install php8.2-gmp
apt install php8.2-gd
apt install php8.2-mbstring
apt install php8.2-xml
apt install php8.2-curl
apt install php8.2-zip
apt install php8.2-gmp
apt install php8.2-mysql
apt install php8.2-fpm
apt install php8.2-imagick
apt install php8.2-soap
apt install php8.2-common
apt install php8.2-intl

I was able to just run this.

sudo apt install php8.2-bcmath php8.2-gmp php8.2-gd php8.2-mbstring php8.2-xml php8.2-curl php8.2-zip php8.2-gmp php8.2-mysql php8.2-fpm php8.2-imagick php8.2-soap php8.2-common php8.2-intl

So I think that did everything. Next up:

apt install git
apt install mariadb-server mariadb-client nginx vim

wget https://github.com/invoiceninja/invoiceninja/releases/download/v5.11.62/invoiceninja.tar

tar -xvf invoiceninja.tar
rm invoiceninja.tar

Next up is the database creation. Back to the template given.

# mysql -u root -p
Enter Password:  ******
MariaDB .. > create database invoicedb;
MariaDB .. > create user 'ninja'@'localhost' identified by 'ninjapass';
MariaDB .. > grant all privileges on invoicedb.* to 'ninja'@'localhost';
MariaDB .. > flush privileges;
MariaDB .. > exit

Bear in mind that the “invoicedb”, user called “ninja” and the password called “ninjapass” should be changed to what you’d like.

Next we’ll copy the .env file and edit it. First with the copy using sudo cp .env.example .env and then we can edit using sudo nano .env.

Focused on the three entries as stated before.

DB_DATABASE=
DB_USERNAME=
DB_PASSWORD=

sudo chown www-data:www-data /var/www/invoiceninja/.env
sudo php8.2 /var/www/invoiceninja/artisan key:generate
sudo php8.2 /var/www/invoiceninja/artisan migrate:fresh --seed

From here we’re on to STEP 3. This time with NGINX.

sudo nano /etc/nginx/conf.d/invoiceninja.conf

Then we edit and put in the URL for your actual site.

server {
    listen   80;
    listen   [::]:80;
    server_name invoice.yourdomain.com;

    root /var/www/invoiceninja/public/;
    index index.php index.html index.htm;
    charset utf-8;
    client_max_body_size 20M;

    location / {
        try_files $uri $uri/ /index.php?$query_string;
    }

    if (!-e $request_filename) {
       rewrite ^(.+)$ /index.php?q= last;
    }

    location = /favicon.ico { access_log off; log_not_found off; }
    location = /robots.txt  { access_log off; log_not_found off; }

    access_log  /var/log/nginx/invoiceninja.access.log;
    error_log   /var/log/nginx/invoiceninja.error.log;

    location ~ \.php$ {
        fastcgi_split_path_info ^(.+\.php)(/.+)$;
        fastcgi_pass unix:/run/php/php8.1-fpm.sock;
        fastcgi_index index.php;
        include fastcgi_params;
        fastcgi_param SCRIPT_FILENAME $document_root$fastcgi_script_name;
        fastcgi_intercept_errors off;
        fastcgi_buffer_size 16k;
        fastcgi_buffers 4 16k;
    }

    location ~ /\.ht {
        deny all;
    }

    sendfile off;
}

sudo nginx -t

If successful then proced - otherwise troubleshoot.

sudo systemctl reload nginx

IN should be available at “ninja.yoursite.com/setup” - but all I get is an error.

No change if I reboot. So now I’m at a loss on how to proceed. Funny though - it does have the IN logo in the browser tab

Any help is welcome. Thanks in advance.

EDIT
I’m going to review this guide once more.

And check if I missed something or can do a mix of what’s there and what I did here. I’ll start by attempting what’s posted there first - as best as I can - and then make changes as needed if I run into errors. Will see if I can get it working or not, but still waiting on any assistance.

So this was taking too much time for me and I do have invoices I need to get out. I’ve found someone on Fiverr that has more XP than I do and paid for assistance. Once the issues are found and resolved I’ll post their details here. I’ll also attempt to redo deployment when they’ve figured what I did wrong or wasn’t doing, then post a full set of instructions all being well.

EDIT
So here’s the link to the person that I used.

https://www.fiverr.com/ankit547

Apparently my 502 errors were caused by multiple NGINX blocks using the same domain name across different config files. This created a conflict causing NGINX to not route requests correctly. The conflicted files were renamed and only the working one was left.

Path to the configuration files is etc/nginx/conf.d/. The correct config file was left under /etc/nginx/sites-available/

Especially if you’re more familiar with the Windows environment, it may be easier to navigate and deal with the configs using WinSCP.

Let me attempt to redo and advise.

EDIT
This may take some time. The time zone difference is an issue, but my system is up and working. I will create snapshots and make attempts each time to see what’s up. Once I have the setup and steps streamlined - will come back and post the details.

Just had an issue with invoices (PDF). Managed to get that working after looking through this.

Installed all using the command below.

apt install libnss3 libatk1.0-0 libatk-bridge2.0-0 libcups2 libdrm-common libdrm2 libxcomposite1  libxdamage1 libxext6 libxfixes3 libxrandr2 libgbm1 libxkbcommon0 libpango-1.0-0 libcairo2 libasound2 -y

PDF now works.

Still working on the whole initial setup part - but I’m currently trying to get my instance functional - backup/snapshot - then go back and try again. Things like above that come up will be integrated into the instructions at the end for a smooth experience.

Hi,

Thanks for sharing this! Glad you were able to get it working in the end…

That’s a blast from the past…

I’m surprised they haven’t fixed that yet. I was having trouble with the Turnkey image but it looks like the problem goes all the way back.

It is working - but I’m still trying to get a working process documented that persons can follow. Unless the install script linked previously is fixed and starts working - the setup isn’t that straightforward.

Well - apparently. And it seems that v5 is far more resource intensive than v4. I think I was running v5.3 or even up to v5.5. After the hosting provider server crashed and the restore was done, they immediately moved me to 5.10.x and then it was all downhill. The number of processes in use went crazy. I’ve even seen posts where the backup/restore function doesn’t work. I think it’s all resource related, as my current VPS running it has MUCH higher resources than what the web hosting would have allowed. And thus far, EVERYTHING works. Backup and restore. Export and import. Even upgrades. So even though it’s costing me a bit more, I may not go back. Unless we’re sure that the resource usage issues are fixed.

In any case. I’m still trying to get this functional. I also have the old SQL database that I’d want to import on completion and document that process. Would really appreciate added help in getting those done so we can have something straightforward - not necessarily simple - but at least steps that persons can copy/paste and get up and running.

Hey,

just fell over this. Essentially, you’re not stuck. You’re pretty much done with the installation of the inmanage script and ready to go from here. But you need to read the manual in order to know your options. Or view the detailed instruction video.

Here a theroretical scenario how to put it right:

Have a base dir [like: /www/your.domain.tld; or /usr/share/nginx/xyz]. It contains side by side:

  • The invoice ninja installation target directory.
  • The inmanage script installed like described here.

The fastest way to get an up and running experience is to use the installation provision feature.

I hope that clarifies some things. Have a good one.

Hi @dros - I’ll video the process and upload so you can see what was being done. It’s likely me making mistakes, but I intend to simplify things as much as possible for those who have little to no CLI experience. Let’s see how it goes. I’ll review and redo.

1 Like